
Tips for Applying New Stucco Over Existing Surfaces
Introduction
Stucco is a popular choice for exterior finishes, especially in regions like Fort Saskatchewan, AB, Canada. Its durability and aesthetic appeal make it an excellent investment for homeowners. However, over time, existing stucco surfaces may suffer from wear and tear, leading to the need for stucco repair. In this article, we will explore Layering Stucco: Tips for Applying New Stucco Over Existing Surfaces, offering valuable insights into the process and best practices.
What is Stucco?
Understanding the Composition of Stucco
Stucco is primarily made up of cement, sand, lime, and water. This combination creates a durable material that can withstand various weather conditions. It’s commonly used on homes because of its low maintenance needs and appealing finish.
Benefits of Using Stucco
Why Layer New Stucco?
Enhancing Aesthetic Appeal
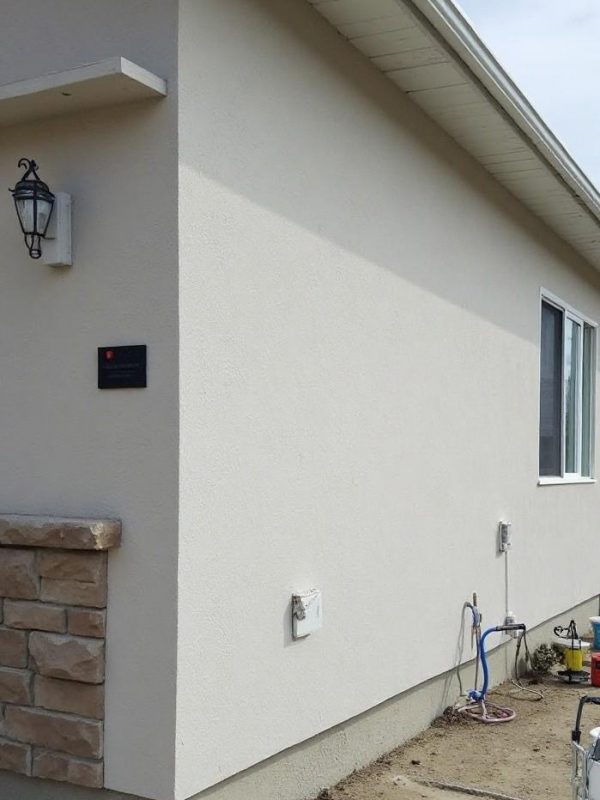
Layering new stucco can refresh the look of your home’s exterior without the hassle of tearing down old material.
Improving Durability
New layers can add strength to aged surfaces, providing better protection against harsh weather conditions.
Cost-Effective Solution
Instead of complete removal and replacement, layering offers a more budget-friendly option for stucco repair.
Preparing Your Surface
Inspecting Existing Stucco
Before applying new stucco, inspect the existing surface for cracks or damage. Look for areas that need repair or reinforcement.
Cleaning the Surface
A clean surface is vital for proper adhesion. Use a power washer to remove dirt and loose particles from the old stucco.
Repairing Damaged Areas
For cracks or holes larger than 1/8 inch, use a suitable patching compound to fill those gaps before layering new stucco.
Choosing the Right Materials
Selecting Quality Stucco Mix
Opt for high-quality stucco mixes that are designed for layering. These typically contain additives that improve bonding and flexibility.
Understanding Color Options
Choose a color that complements your home’s architecture. Remember that darker colors may absorb more heat than lighter ones.
Tools You'll Need
Essential Tools List
- Trowels (flat and finishing)
- Hawk board
- Mixing bucket or tub
- Power washer or garden hose
- Paintbrushes
- Safety gear (gloves, goggles)
Mixing the New Stucco
Proper Mixing Techniques
Follow manufacturer instructions carefully when mixing your stucco blend to achieve optimal consistency.
Avoiding Common Mixing Mistakes
Be cautious not to add too much water; it can weaken the mixture's integrity.
Application Techniques
Layering Process Overview
When applying new stucco over existing surfaces, it’s essential to layer correctly to ensure proper adhesion and durability.
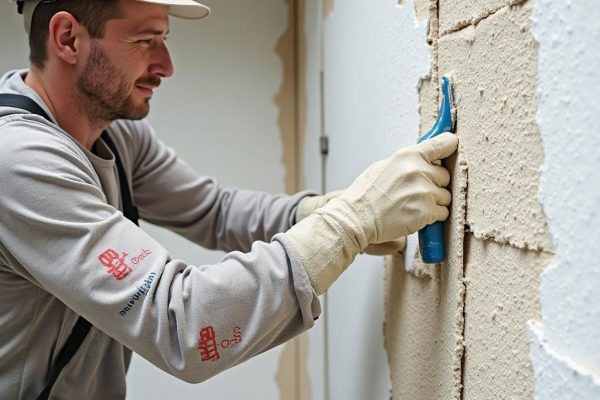
Step 1: Scratch Coat Application
Apply a scratch coat first using a trowel. This coat provides texture for subsequent layers to grip onto effectively.
Step 2: Curing Time
Allow adequate curing time (typically 24 hours) before proceeding with additional coats.
Step 3: Second Coat Application
For added thickness and durability, apply a second layer after scratching the first layer lightly once it has cured slightly but is still damp.
Step 4: Finishing Touches
Use a finishing trowel to smooth out imperfections once the last coat is applied.
Maintaining Your New Stucco Finish
Regular Inspections
Conduct regular checks for cracks or signs of wear after your new layer has cured completely.
Cleaning Recommendations
Wash down your stucco surfaces annually with mild soap and water to keep them looking fresh and vibrant.
Understanding Local Climate Impact on Stucco
Weather Considerations in Fort Saskatchewan
The local climate can significantly impact how well your new stucco holds up over time. Be sure you account for seasonal changes when planning your application!
Winter Precautions
In colder months, avoid applying new layers when temperatures drop below zero degrees Celsius as this can affect curing times negatively.
Summer Heat Effects
High temperatures can lead to rapid drying; consider moistening your substrate prior to application in hot weather conditions!
Troubleshooting Common Issues
Cracking Issues
If you notice cracks appearing in your newly layered stucco within months of installation:
Peeling Problems
Peeling often occurs due to improper application techniques or poor-quality materials being used initially; addressing these issues promptly will save you headaches later!
Frequently Asked Questions (FAQs)
Q1: Can I apply new stucco directly over cracked surfaces?
A1: No! It’s essential first to repair any significant cracks before Depend Exteriors stucco contractor in Fort Saskatchewan applying new layers of stucco; this ensures proper adhesion and longevity!
Q2: How long does it take for layered stucco to cure fully?
A2: Typically around three weeks until fully cured but check product specifications as times vary based on environmental factors!
Q3: What kind of paint should I use on my newly applied stuccos?
A3: Exterior-grade paints designed specifically for masonry are recommended since they provide better protection against elements compared with standard house paints!
Q4: Is there any special maintenance required during winter months?
A4: Yes! Avoid excessive snow buildup against walls as moisture could seep into pores causing damage over time—make sure drainage systems function properly too!
Q5: How thick should each coat be during layering?
A5: Ideally around ¼ inch per layer will suffice; thicker layers may not cure evenly so stick within suggested ranges outlined by manufacturers’ guidelines!
Q6: Can I DIY my own re-stucco project?
A6 : Absolutely! Just ensure you have all necessary tools ready along with understanding procedures involved beforehand—if unsure consult professionals locally based near Fort Saskatchewan who specialize in such work!
Conclusion
Layering new stucco over existing surfaces can breathe life back into worn exteriors while enhancing both value and aesthetics without extensive renovations! By following these tips on preparation techniques through application methods right here at home in Fort Saskatchewan—success awaits! Remember always prioritize quality materials coupled alongside proper maintenance practices post-installation ensuring longevity remains intact throughout seasons ahead! So roll up those sleeves folks—your home deserves this upgrade today!